Prototyping and testing for the IoT: methodologies and tools

The prototyping and testing phase for the IoT (Internet of Things) is crucial to any project. These stages enable concepts to be validated, problems to be detected before they go into production and devices to be guaranteed to work properly in real-life conditions. In this article, we explore the essential methods and tools for successfully completing these key stages.

Why are IoT prototyping and testing essential?

The IoT prototyping and testing phase is an iterative stage where initial ideas take concrete form. It allows us to test technical feasibility, identify needs for improvement and gather feedback before moving on to production.

  • Risk reduction: detect problems early in the process.
  • Time and cost savings: correcting errors on a prototype is less costly than on a final product.
  • Functional validation: ensuring that hardware and software components communicate effectively.

Prototyping methods for the IoT

  • Rapid prototyping:
    Rapid prototyping is a method of rapidly creating working versions of an IoT product. It involves using hardware development kits and software development platforms to iteratively test concepts.
    • Arduino: a flexible platform, ideal for simple hardware prototypes.
    • Raspberry Pi: suitable for projects requiring greater computing capacity.
  • Simulation and emulation
    Simulation and emulation tools enable the project to be tested without the need for physical hardware, which speeds up the development process. IoT emulators, in particular, mimic the behaviour of sensors to test connectivity, communication and performance.
    Before building a physical prototype, IoT systems can be tested virtually using platforms such as :
    • IoTIFY: a simulator that recreates the behaviour of connected devices and IoT networks.
    • Integrated emulators: for testing the communication between sensors and the software platform.

Next step: IoT testing under real conditions

The IoT prototyping and testing phase is divided into several stages. Once the prototype has been established, rigorous testing is required to guarantee its reliability and performance.

  • Hardware tests:
    • Checking sensor performance (accuracy, latency, etc.).
    • Compatibility tests to ensure that components interact without conflict.
  • Network tests:
    • Assess the stability of wireless connections (Wi-Fi, Bluetooth, LoRa, etc.).
    • Simulate difficult conditions (poor network coverage, interference).
  • Real-life testing:
    Test IoT devices under expected conditions (domestic, industrial, outdoor) to ensure their effectiveness in real-life scenarios.

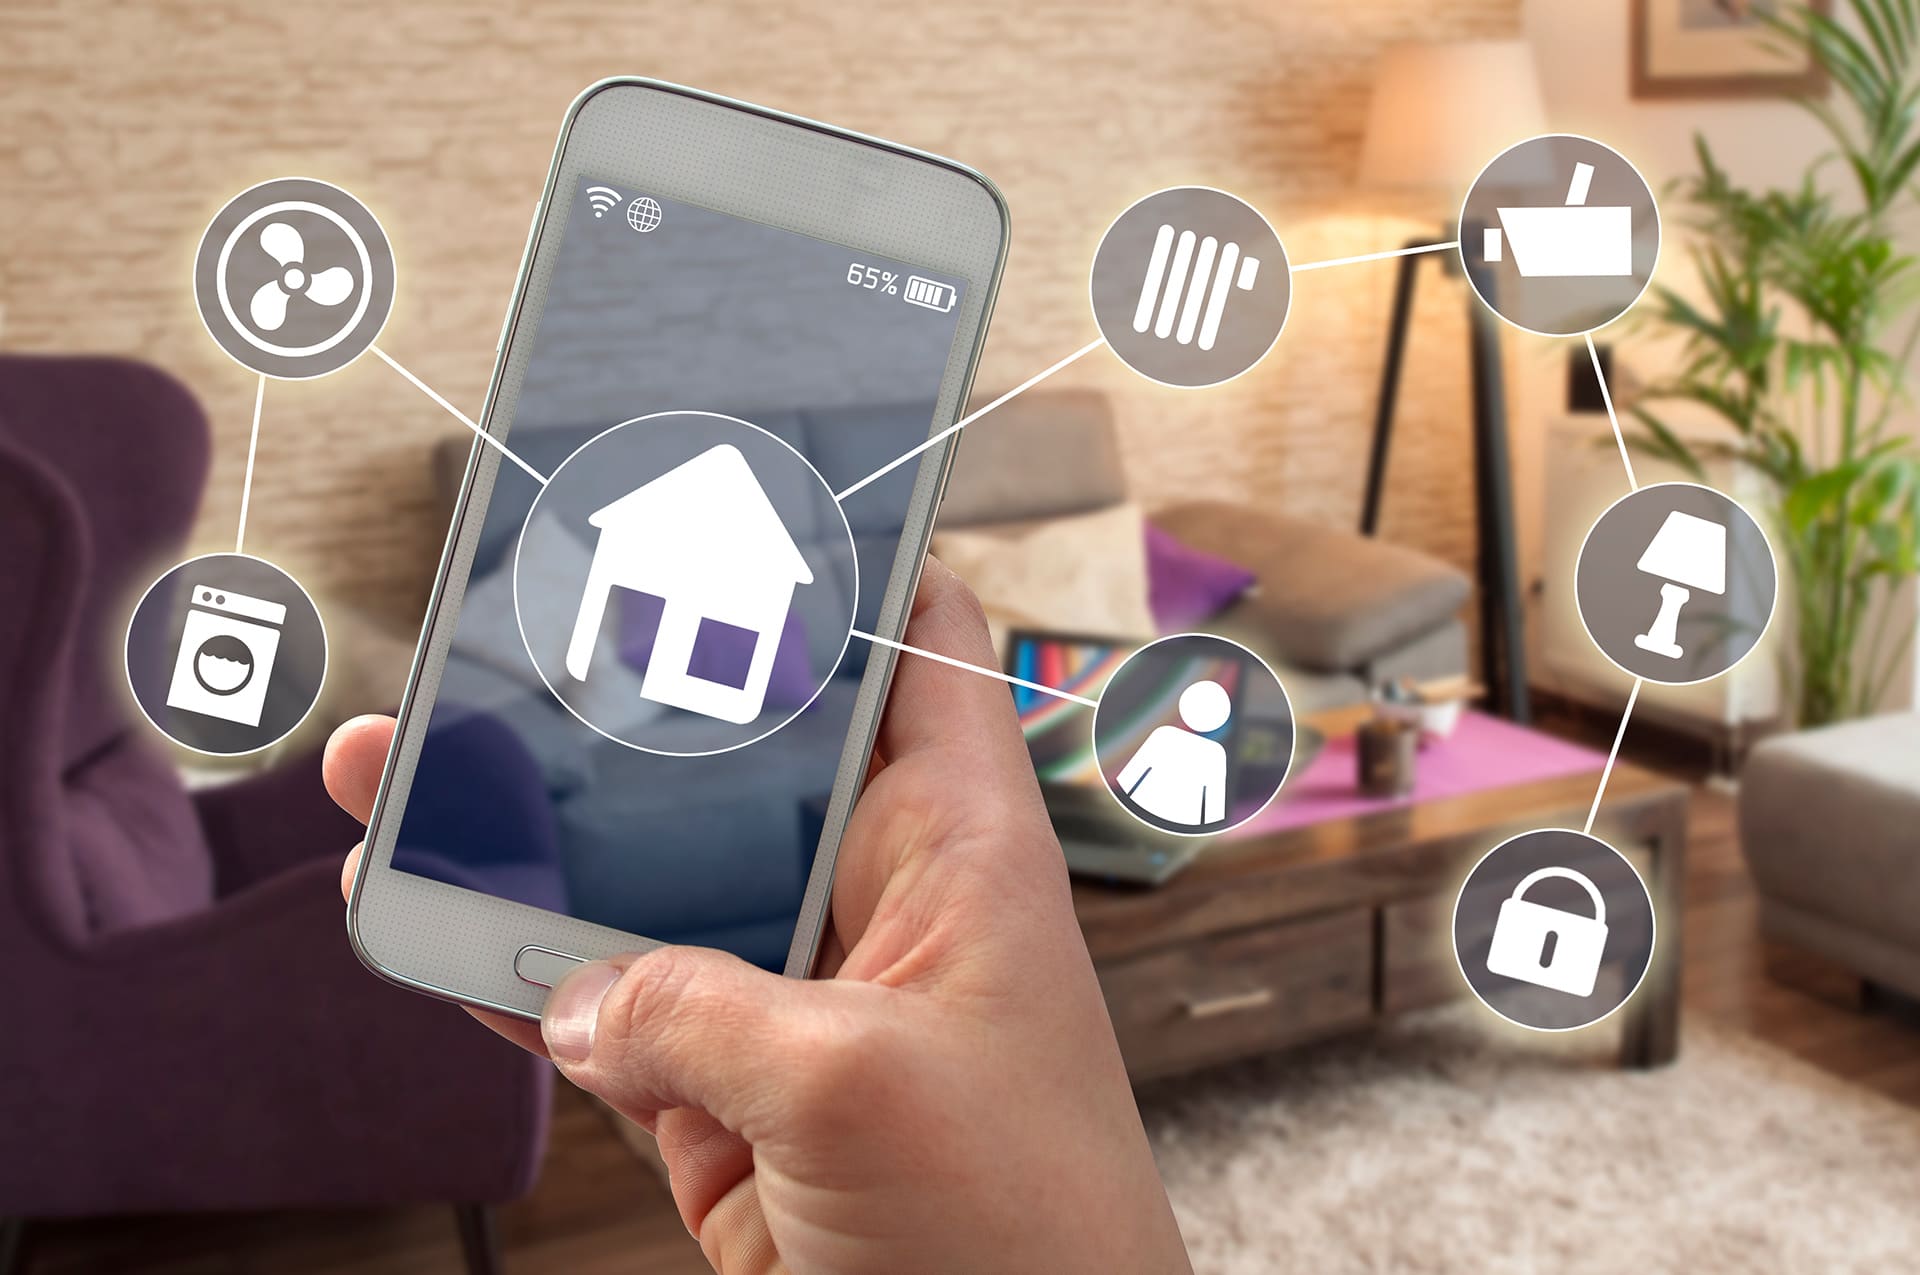
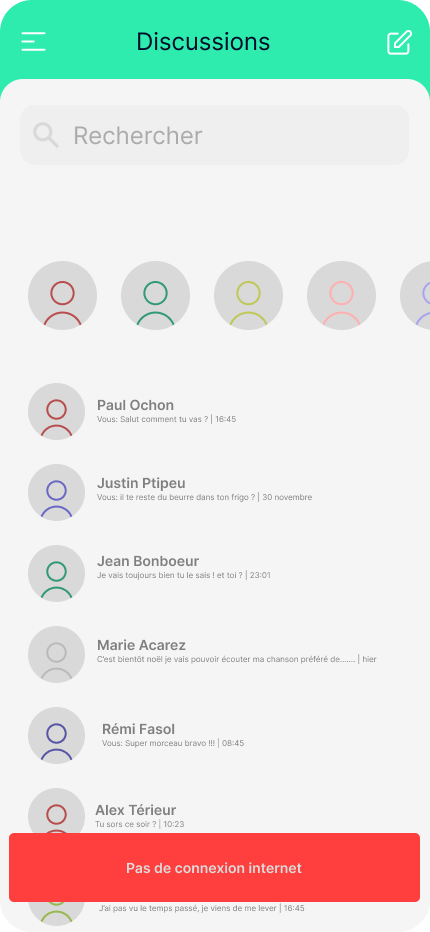
Development of user interfaces

The IoT prototyping and testing phase is followed by the development of the user interface. The user interface (UI) plays an essential role in making the IoT product intuitive and functional. Good UI prototyping is just as crucial as the hardware.

  • Recommended technologies :
    • Flutter: powerful cross-platform framework for rapidly developing mobile applications to control IoT devices.
    • Flutter_reactive_ble: library adapted to manage Bluetooth Low Energy communication.
  • Advantages of Flutter for IoT projects :
    • A single code for Android, iOS and the web.
    • Responsive and aesthetic interfaces thanks to a widget-based architecture.

The use of Flutter in an IoT project is facilitated by libraries. For example, if you want to use BLE (Bluetooth Low Energy), the flutter_reactive_ble package, developed by Philips, is essential.

Tools for successful prototyping

  • Hardware platforms:
    Arduino, Raspberry Pi, ESP32 (for projects requiring Wi-Fi and Bluetooth).
  • Development software:
    • PlatformIO: integrated development environment for working on different microcontrollers.
    • Fritzing: circuit design software, useful for planning electronic prototyping.
  • Test tools:
    • Multimeter: to check electrical connections.
    • Network analysis software: Wireshark to monitor communication between devices.

Case studies: prototyping in action

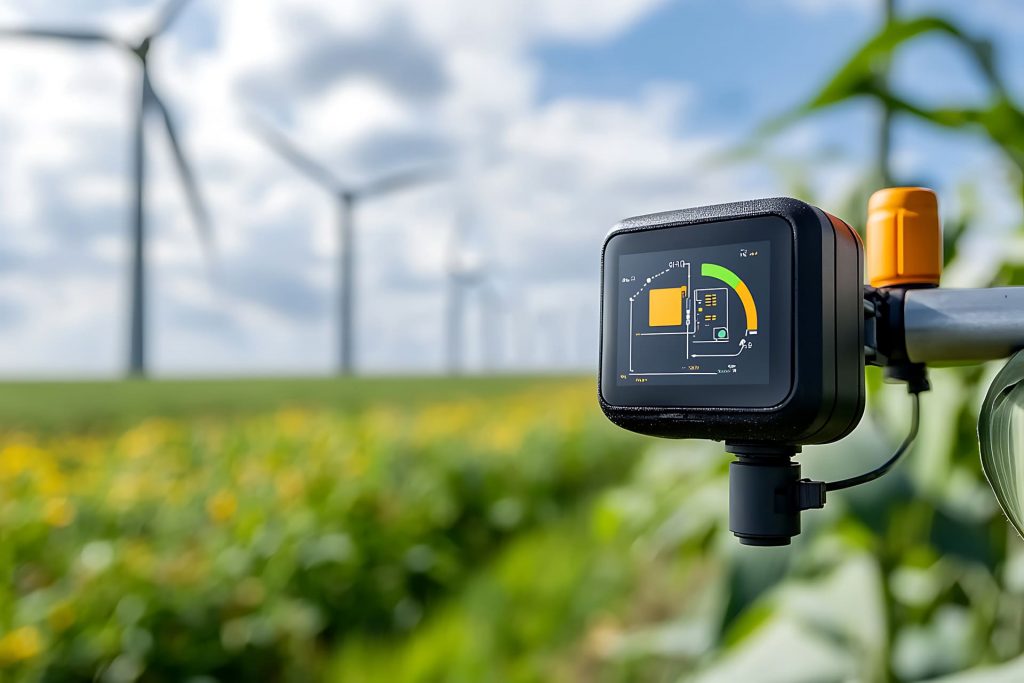
Let’s take the example of an IoT project for an intelligent greenhouse:

prototypage et tests pour l'iot exemple d'une serre intelligente

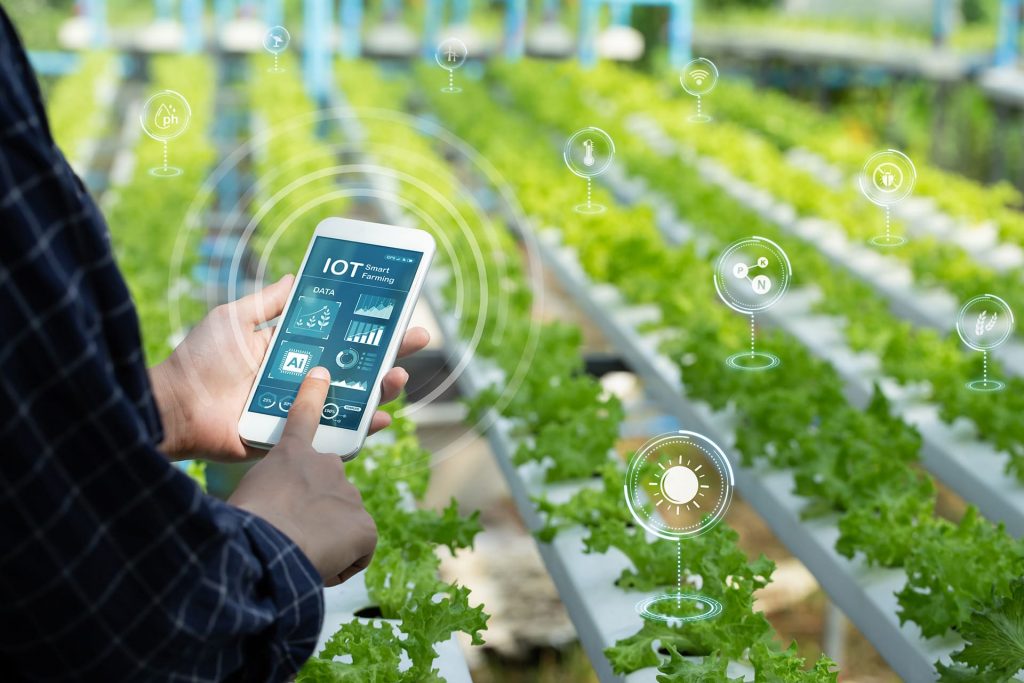
1. Rapid IoT prototyping and testing

To develop an intelligent greenhouse, rapid prototyping starts with the use of key sensors:

  • Temperature and humidity sensors: These measure the environmental conditions in the greenhouse.
  • Arduino board: This is used as a development platform to connect the sensors and process the data.
  • IoT connectivity: A Wi-Fi or Bluetooth module is built into the board to transmit data to a cloud or management application.

This minimum package will enable us to lay the foundations for a functional prototype at low cost and with rapid implementation.

2. Simulation: Testing before real integration

Before testing in real conditions, a simulation is carried out to check that the system is working properly:

  • Software such as IoTIFY or Blynk: These platforms simulate the connectivity between sensors and a cloud environment. They can be used to:
    • Test data transmission.
    • View the information collected (e.g. real-time graphs).
    • Configure alerts or automated actions, such as watering triggered at a defined humidity threshold.

This step enables technical problems to be identified and corrected without affecting the greenhouse.

3. Testing under real conditions: Validation in the greenhouse

Once the prototype has been validated in simulation, it is installed in a greenhouse for practical testing:

  • Checking the accuracy of the measurements: The sensor data is compared with standard measuring instruments to ensure its reliability.
  • Watering automation: An automatic watering system, based on defined humidity thresholds, is activated. Adjustments are monitored in real time to measure the impact on plant growth.
  • Data collection for long-term analysis: Information is stored in a cloud, enabling performance to be analysed over an extended period (e.g. energy efficiency, reduction in water wastage).

Results and benefits

This structured prototyping process makes it possible to :

  • Reduce costs and lead times by rapidly iterating on the design.
  • Guarantee a smooth transition between the design phase and production.
  • Obtain data that can be used to improve the system (e.g. adjust thresholds or improve sensors).

The IoT prototyping and testing phase is an essential step in transforming an idea into a functional product. Combined with rigorous testing, it guarantees the technical viability and reliability of IoT projects. By using the right tools and methods, companies can not only reduce costs, but also speed up development and improve the quality of their products.

Planning an IoT project? Set up a solid IoT prototyping and testing phase and test each component to ensure the success of your initiative!

Posted in Uncategorised

The essential components of an IoT project: from design to connection

An IoT (Internet of Things) project is based on the interconnection between hardware and software components, all of which are essential for collecting, transmitting, analysing and using data. This article explores the essential components of an IoT project, from data collection via sensors to the user interface.

Sensors: the foundation of IoT projects

Among the essential components of an IoT project, sensors are the first indispensable element, the heart of any IoT system. They collect data in real time from the physical environment. This data is then used to trigger actions or analyses.

  • Common types of sensor :
    • Temperature and humidity sensors: used in home automation and agriculture to monitor environmental conditions.
    • Accelerometers: measure acceleration, used in connected watches or to detect vibrations in industry.
    • Proximity sensors: ideal for security systems and industrial applications.

Depending on the project, other types of sensor can be integrated, such as those measuring pressure, light or air quality.

Composants essentiels d'un projet IoT

Connectivity: linking devices to the system

Connectivity is the second essential component of an IoT project.
Connectivity is essential for transferring data from sensors to processing platforms. The choice of technology depends on requirements in terms of range, energy consumption and throughput.

  • Wi-Fi: ideal for large amounts of data and a stable connection, but energy-hungry.
  • Bluetooth: perfect for short-range communications with low power consumption.
  • ZigBee: widely used for smart homes, thanks to its low cost and mesh capacity.
  • LoRaWAN: offers a very long range and low energy consumption, suitable for rural areas or industrial projects.
  • Cellular networks: essential for mobile devices requiring extensive coverage, despite higher costs and energy consumption.

Each technology has its own advantages and disadvantages, depending on the context, and needs to be carefully evaluated.

Data storage: local or cloud?

The essential components of an IoT project: data storage.
The data collected by sensors needs to be stored before it can be analysed. Storage can be local (on the device itself or on a dedicated server) or in the cloud, each solution having its advantages.

  • Local storage:
    Appropriate for specific security needs or when the internet connection is intermittent.
  • Cloud storage:
    Enables large volumes of data to be managed and accessed in real time.
    Common technologies:
    • MongoDB for unstructured or massive data.
      MongoDB is a document-oriented NoSQL database. It is therefore ideally suited to IoT applications, which sometimes require great flexibility in data storage. It also makes it easy to manage massive volumes of unstructured data. It is often used to store real-time sensor data, event logs, etc.
    • InfluxDB for time series, ideal for chronological data such as sensor data.
      InfluxDB specialises in the storage of time series. If you have time series data, such as sensor data, this is ideal. It is optimised for fast writes while being able to manage large amounts of data with low latency. InfluxDB is often used for infrastructure monitoring, performance analysis, tracking environmental conditions or managing industrial equipment…

The choice of storage method depends on the speed of data access, available bandwidth and budgetary constraints.

Web platform or mobile application: the user interface

The essential components of an IoT project: the user interface.
The user interface is the point of contact between the user and the IoT system. A good platform must be intuitive, responsive and accessible.

  • Key roles:
    • Enable configuration of connected devices.
    • View data collected in real time.
    • Provide control options, such as adjusting temperature or activating alarms.
  • Examples of use:
    • In a smart home, a mobile application can be used to adjust lighting or monitor security systems.
    • In agriculture, a platform can provide real-time graphs of soil moisture or the weather.

Responsive design is crucial if the interface is to be usable on screens of varying sizes (smartphones, tablets, computers).

The importance of coherent integration

A successful IoT project depends on the ability to integrate these different components harmoniously. For example, a high-performance sensor becomes useless if it is coupled with an unstable connection or a complicated user interface. Particular attention must be paid to the compatibility of components, the scalability of the architecture, and data security at every stage.

Conclusion

The essential components of an IoT project are the foundations on which the entire value of the solution rests. From the choice of sensors to the design of the user interface, each stage requires special attention to ensure that the system is reliable, high-performing and tailored to your needs.

Ready to get started on your IoT project? Take the time to plan each component carefully, to lay a solid foundation for the success of your initiative.

Interested in IoT projects? Read our introductory article on IoT: key concepts and key use cases

Introduction to the IoT: key concepts and key use cases

The Internet of Things (IoT) is transforming our daily lives by connecting the physical and digital worlds. Behind this acronym lies a technological revolution that is redefining the way we interact with our environment. Let’s start with an introduction to the IoT: what is it, what are its basic concepts, and how is this technology finding applications in various sectors? This article provides an overview.

What is IoT?

The IoT brings together a range of physical objects connected to the Internet, capable of collecting, transmitting and, in some cases, analysing data in real time. These objects range from domestic appliances such as smart thermostats to sophisticated industrial equipment, agricultural sensors and portable health devices.

Unlike traditional electronics, IoT devices often incorporate artificial intelligence, enabling them to anticipate user needs and act autonomously. In short, the IoT represents a global ‘nervous system’, woven together by inter-object connections, making our world more interactive and responsive.

Key IoT concepts

  • Sensors and data collection:
    Sensors are the cornerstone of the IoT. They measure variables such as temperature, pressure or movement, converting this data into usable signals.
  • Connectivity:
    To function, IoT objects need to communicate with each other or with management platforms via technologies such as Wi-Fi, Bluetooth, or LoRaWAN- or ZigBee-based networks.
  • Processing and analysis:
    The data collected is then stored, often in the cloud, and analysed to generate actionable information, whether for real-time monitoring or future optimisation.
  • User interface:
    IoT platforms allow users to interact with devices, via mobile apps or web interfaces, making objects accessible and easy to control.

Essential use cases

The IoT has applications in almost every sector of the economy. Here are just a few examples:

Home automation:
Smart homes use IoT devices to improve comfort, security and energy efficiency. For example, a connected thermostat automatically adjusts the temperature according to your habits.

Health:
Wearable devices, such as smartwatches, can track health parameters in real time, such as heart rate, helping to prevent medical emergencies.

Industry:
Factories are adopting the IoT to optimise their processes, with sensors monitoring machinery in real time and activating predictive maintenance.

Agriculture:
Thanks to IoT sensors, farmers can monitor soil conditions and adjust irrigation to maximise yields while minimising the resources used.

Transport:
Connected cars and IoT-based traffic management solutions can reduce congestion, improve safety and optimise routes.

The future of the IoT: infinite opportunities

Despite a temporary slowdown in the hype surrounding the IoT, this technology continues to develop, particularly with advances in artificial intelligence and 5G connectivity. These innovations promise to multiply the number of use cases, making the IoT more accessible and powerful than ever.

As we enter an era where every object can become ‘intelligent’, it is essential for businesses to see the IoT not as a fad, but as an essential strategic opportunity.

The IoT is no longer a futuristic vision, but a reality that is shaping our daily lives and our industries.

Whether it’s improving quality of life or optimising industrial operations, this technology offers immense potential. For companies looking to get started, it’s crucial to understand the key concepts and use cases in order to maximise the benefits.

Do you have an IoT project in mind? Start exploring now how this technological revolution can meet your specific needs!

Does a project’s completion mean its death?

Let’s talk about the post-mortem! 💀

achèvement d’un projet

You’ve just completed a great project, it’s gone into production and the warranty phase is over! You’ll remember it for a long time to come, and all the wonderful memories you’ve shared together on this fascinating subject… It’s a shame that you’ll now have to move on to something else!
Sound absurd? It’s a good thing we do too!
Why don’t we talk about the post-mortem reunion?

Is “post-mortem” the right term?

👩‍🏫 The school update

The expression “post-mortem” comes from the Latin “post” meaning “after” and “mortem” meaning “death”. So the post-mortem meeting is a meeting supposedly held “after the death” of the project.
But in the web context, once a project has been completed, can we really speak of its death?

When is a project completed?

First of all, it’s important to differentiate between project completion and project interruption:

  • A project is completed when all phases are finished.
  • A project is interrupted when, for one reason or another, it is decided to stop the project in the middle or at the end.

The term “post-mortem” may therefore make sense after a project has been interrupted. After completion, however, can we really speak of the death of the project?

From our point of view, the life of a project continues long after it has gone live! That’s when the feedback from the first people involved begins to flow in, as the solution begins to be truly tested, and users are able to assess its relevance in the context of their business issues.
At TCM, we prefer to talk in retrospect.

What is the purpose of a project retrospective? 🎯

Project retrospection is based on 4 key points:

  • Evaluate project progress
  • Discuss solution performance
  • Explore prospects for further development
  • Highlight positive points to reproduce and mistakes to avoid in the future

Who takes part in a project retrospective?

To determine who should participate in a project retrospective, you can ask yourself the following questions:

  • Who was involved in the project?
  • Who worked on it?
  • Who will use the project?

At TCM, we usually involve at least one of the following people:

  • A technical referent: a person who participated in the development of the project and is familiar with the technical aspects and challenges faced by the developers.
  • A project management referent: One of the people who planned, coordinated and supervised the project.
  • A sales representative: The person who was the first point of contact between TCM and the project initiator.
  • The customer: The person who initiated the project.

What do we talk about in a retrospective?

Introducing the participants

The first thing to do is to set aside time for each meeting participant to introduce himself or herself. Some of the participants may not know each other, and this introduction enables each participant to know who he or she is talking to, and what his or her role is in the meeting.

Setting out the objectives of the meeting

The next step is to outline the objectives of the meeting: Why have we brought everyone together? What is this meeting about?

Project context

Some stakeholders may work on many topics in parallel, so reminding everyone of the topic ensures that everyone knows exactly what is being discussed.

Project Progression

Provide an overview of how the project progressed:

  • What were the different phases?
  • Was the schedule respected? Was there any advance or delay? For what reasons?
  • How was the project managed?

Including statistics that represent the work accomplished can also be interesting.

Solution Performance

This point is very important. Evaluating the performance of the provided solution will determine if the needs were correctly met. To do this, you can follow these steps:

  • Recall the initial needs defined
  • Show the technical solution implemented to meet them
  • Determine if the solution meets expectations and provide quantified data on the project’s usage

Key Events

Try to highlight the various strengths and challenges you encountered during the project.

Things to Reproduce or Avoid

And if one day you had to undertake a new project with the same team or evolve the current product, what are the interesting points you would like to do the same way? What are the points to avoid at all costs? Think about gathering the general feedback from the teams, even if the individuals in question are not participating in the meeting.

Future Prospects

Identify the evolutions that could be added to the project and solicit the end users about their use of the platform.

Inclusion of Cross-Functional Points

Are there any cross-functional points you would like to address? For example: project maintenance.

Next Steps

What are the next steps for the project?

Meeting Summary

Recap the key points discussed throughout the meeting and list the actions to be taken.

Conclusion

The main objective of the retrospective meeting is to take a step back from the work done to continue collaborating in the best possible way. The retrospective does not aim to close the project but to keep it alive and evolving by drawing beneficial lessons from past experiences in a continuous improvement process.

Offline but never limited: optimize your app with offline mode

Imagine a revolutionary mobile app, a kind of digital genie that makes your wildest desires come true: it makes your morning coffee, plans your day, keeps you connected with your loved ones, runs your errands, and even – why not – it could go to work for you when fatigue gets too much to bear! After several months of use, it has become your indispensable digital companion.

However, one day, without warning, your Internet connection abandons you, the wifi goes on strike and you find yourself stuck with the most chaotic EDGE network. The coffee machine refuses to obey, your diary gets lost in the meanders of cyberspace, conversations with your loved ones have disappeared and your groceries are no longer automatically ordered. A blank screen appears, followed by endless loading… in short, the application stops responding… Everything seems to collapse at that very moment. An application so wonderful, so vital, suddenly becomes unusable because of a simple Internet outage?

Let’s find out how this supposedly “brilliant” application can really become so, even when the Internet connection fails.

User experience at the heart of applications

When creating a mobile application, everything revolves around the user experience. It’s what guides every step of the design process. The above example is extreme, but it provides a striking illustration of the consequences of a network failure. However, more concrete situations can also highlight the crucial importance of offline mode.

Let’s imagine an application where employees have to swipe a QR Code to start missions at specific locations. If these QR Codes are placed in unstable network zones, such as dead zones or buildings with poor reception, the user will be faced with the frustration of seeing the application, vaunted by their superiors, malfunction.

Unstable Internet connections are not limited to isolated situations. They can be caused by a variety of factors, such as limited connections (in hotels or abroad), power failures, extreme weather conditions, or even poor coverage on the part of the service provider.

When we set out to create a mobile application, the consideration of lost or poor connection quality must be at the heart of every feature we develop. This ensures an optimal application experience, even when connectivity conditions are difficult.

Offline mode, you say?

Implementing offline mode in a mobile application enables it to continue to function and offer certain features, even when the device has little or no access to the Internet. However, ensuring continuous use of the application is no magic trick. Some functions cannot function without an Internet connection, but there are various ways of dealing with loss of connection, as illustrated below.

For example, real-time messaging requires an active connection to function fully. If you’re interested in this subject, we have an article here: Real-time web, when every second counts! However, even in these cases, alternative solutions can be envisaged to enhance the user experience despite the absence of a connection.

How can offline mode concretely improve the user experience?

Let’s take a basic instant messaging application as an example. In this application, the first screen shows the list of conversations (1), and as soon as you select one of them, the whole conversation is displayed (2).

If we hadn’t taken future users into account, we would have assumed that everything worked perfectly: the first screen would simply have sent a request via the Internet network to retrieve my conversations. Once the response was received, it would have been displayed in the application and that would have been that. However, the problem arises if, for one of the reasons mentioned above, the network disappears. In this situation, the application would continue to load indefinitely, until a less-than-explicit “Network error” message appeared…

Let’s take a look at how offline mode can enhance the user experience in this specific context:

Visual notification

The first step is to inform the user that their experience is altered and why. This avoids the frustrations of using an application in conditions where it cannot function to its full potential. Many applications cannot be used to their full potential offline. This is the case with YouTube, which blocks video playback, or Messenger, which displays a banner at the top of the application to indicate the absence of a connection. However, no one has the impression that the application is “buggy”.

As far as our messaging application is concerned, let’s focus on the first interface: conversations are stored in a database, but I can’t access this database without an Internet connection. So I might consider displaying a clear and precise error, YouTube-style, explicitly describing the problem encountered:

It’s crucial to use appropriate, simple and understandable terms, without resorting to technical language, to ensure a clear, direct and precise explanation.

Don’t block the user

In the context of our application, the previous notification completely blocks access to discussions (without affecting the rest of the application). However, a better approach would be to offer a less intrusive and aggressive notification, while giving the user the option of accessing a few extra features such as being able to view conversations.

In the case of an unstable connection, it’s better to use an impactful but non-intrusive visual notification when network connectivity fluctuates, rather than a strobe effect between the loaded screen and the error screen.

What’s more, when loading data, it’s best to avoid full-screen loading, which immobilizes the user. Instead, “skeleton loader screens” are preferred, representing spaces (often animated) reserved for the information being loaded. A skeleton screen mimics the structure and appearance of the full view, providing a visual overview of the content waiting to be loaded in each block, be it image, text or any other type of information.

It’s always possible to offer an original way of notifying the user that the application is going offline, by offering a new visual to the application. For example, switch the application to black and white:

Storage

To solve the above problem, one solution would be to store the last 10 messages of the last 10 conversations locally on the phone. This way, even in the event of a weak or non-existent connection, the user would not be blocked.

Storage is an effective solution for improving the user experience when a connection is lost. In our application, it would enable users to see the latest messages in a conversation, such as the address of the restaurant where they have an appointment, even if the network has dropped them.

This approach ensures continuous, convenient use of the application, despite any connectivity disruptions.

Delayed submission

Another way of enhancing the user experience is to offer the possibility of writing and sending a message even when there is no connection. The user can access a conversation, write a message and send it. A clear visual notification will indicate that this message will be transmitted as soon as the network is restored. This feature guarantees uninterrupted use of the application, even when the connection is unstable.

That’s it?

Of course not! In fact, there are many ways to considerably improve a mobile application, even when the network connection is less than optimal. We’ve explored the main elements to be taken into account when designing a quality application, based on a simple example. However, solutions are varied and innovation continues to discover advanced techniques to further enrich the user experience.

Keeping things simple and understanding what the user will and won’t use is the most important thing. We could take the example of more complex applications such as Google Docs, where it is possible to collaborate on a document offline, and where the logic for merging versions has been made as simple as possible. As this is one of the least frequent use cases, Google’s teams have opted for a “simple” solution, which is to merge all the text modified by the authors, at the risk of the text becoming incomprehensible. All that’s then needed is to reword the whole thing. This avoids loss of content, simplifies the source code and its comprehension, and optimizes development time to respond to real user problems.

The possibilities are vast, but every innovation requires a high level of technical expertise and knowledge of user needs. At TheCodingMachine, we like to meet these challenges with passion and expertise!

What can we conclude?

The offline mode represents a technical challenge with its own small challenges if you want to innovate. However, it’s not difficult to produce a quality application that meets the requirements of today’s mobile application consumers, as long as they are placed at the heart of the design.

Author: Jérémy Dollé

Revolutionizing mobile application development: FlutterFlow

FlutterFlow is emerging as an innovative solution that promises to transform the way developers and designers approach application creation. This visual development platform for Flutter offers a fast and simple approach, making application development quite efficient! In this article, we’ll explore the benefits and key features of FlutterFlow, and discover how it may become a must-have tool for mobile app designers (or not).

An intuitive visual interface

FlutterFlow introduces a drag-and-drop visual design interface, enabling users to build (admittedly rather elegant) user interfaces without writing a single line of code! This approach democratizes application development by making it accessible to virtually everyone, while offering sufficient flexibility to satisfy even the most experienced users. By eliminating technical barriers, FlutterFlow opens the way to unprecedented creativity in mobile development.

Rich, expandable functionality

FlutterFlow is not just a design tool; it’s also a complete platform that integrates advanced features such as user authentication, the Firestore database, and even custom API integration. As a result, developers can create rich, interactive applications ranging from simple portfolio applications to complex e-commerce solutions. What’s more, FlutterFlow offers the possibility of adding custom Dart code, providing powerful tools for extending functionality beyond what is possible via the interface.

Collaboration and productivity

FlutterFlow also promotes team collaboration thanks to its integrated sharing and versioning features. Teams can work together in real time, sharing projects and UI components, accelerating the development process and improving application consistency. In particular, this collaborative approach enables rapid prototyping of an application.

FlutterFlow: a bridge to native code

Perhaps what we like best is that FlutterFlow generates native Flutter code. This means that applications created with FlutterFlow can be exported and enhanced in a conventional Flutter development environment. It’s a real novelty! This flexibility makes it an extremely powerful tool in the arsenal of any Flutter application developer.

Well, it does have a few drawbacks, we won’t lie to you…

Platform dependency

The platform introduces an additional layer of dependency into the development cycle. The applications developed are, to some extent, dependent on FlutterFlow’s features and limitations. If the platform doesn’t support certain recent Flutter features, or is slow to update, this can delay or complicate the implementation of these features in your application.

Versioning and source code management

Although the platform offers versioning options, developers accustomed to version management systems such as Github may find these features limited. Fine-grained management of branches, merges and rollbacks could be more complicated, especially in large development teams or for projects with a long and complex lifecycle.

Conclusion

So, we think it’s a real breakthrough in mobile app development, offering a powerful platform that combines simplicity, flexibility and collaboration. Whether you’re a UI designer aspiring to bring your creations to life, a developer looking to speed up the development process, or a team keen to work in a more integrated way, the platform offers the tools you need to turn your ideas into functional, aesthetically pleasing applications. With FlutterFlow, the future of mobile app development looks not only more accessible, but also more promising in terms of efficiency.

What is the Dependency Inversion Principle?

Dependency Inversion Principle (DIP) is a fundamental development concept that contributes to the flexibility and modularity of code. It is one of the five SOLID principles, which guide developers towards a more comprehensible, flexible and maintainable architecture. To sum up this principle: high-level modules should not depend on low-level modules, but both should depend on abstractions. But I understand perfectly well that this is not very clear…
So let’s go into a bit more detail!

What is the Dependency Inversion Principle (DIP)?

DIP, often confused with dependency injection (DI), is a much broader principle. It boils down to two major rules:

High-level modules must not depend on low-level modules. This means that major functionalities in an application must not be influenced by the details of their implementation.

Abstractions should not depend on details; details should depend on abstractions. This highlights the need to define interfaces or abstract classes that dictate what a function or module does, without getting bogged down in how tasks are executed.

PHP implementation examples with Symfony

Example 1: Notification System

In a notification system, rather than coding directly against an e-mail notification class, we define a NotificationInterface interface with a send() method. Different implementations of this interface could include EmailNotification, SMSNotification and so on. This allows the client code to remain the same, even if the notification mechanism changes.

interface NotificationInterface {
    public function send(string $to, string $message): void;
}

class EmailNotification implements NotificationInterface {
    public function send(string $to, string $message): void {
        // Code pour envoyer un email
        mail($to, "Notification", $message);
    }
}

class SmsNotification implements NotificationInterface {
    public function send(string $to, string $message): void {
        // Code pour envoyer un SMS
        // Supposons une fonction sendSms disponible
        sendSms($to, $message);
    }
}

class NotificationService {
    private $notifier;

    public function __construct(NotificationInterface $notifier) {
        $this->notifier = $notifier;
    }

    public function notify(string $to, string $message) {
        $this->notifier->send($to, $message);
    }
}

Example 2: User Management System

When registering a new user, instead of creating a direct dependency on a user data management class, use a UserRepository interface. This lets you change storage methods (database, online storage, etc.) without modifying the rest of your code.

interface UserRepositoryInterface {
    public function save(User $user);
}

class MySqlUserRepository implements UserRepositoryInterface {
    public function save(User $user) {
        // Code pour sauvegarder l'utilisateur dans MySQL
    }
}

class UserController {
    private $userRepository;

    public function __construct(UserRepositoryInterface $userRepository) {
        $this->userRepository = $userRepository;
    }

    public function registerUser(string $username, string $password) {
        $user = new User($username, $password);
        $this->userRepository->save($user);
    }
}

Advantages and disadvantages

Advantages

  • Flexibility: Modifications or extensions to the system can be made without affecting other parts of the architecture.
  • Ease of testing: Components can be tested independently using mock objects.
  • Reduced coupling: The system becomes less dependent on specific implementations.

Disadvantages

  • Increased complexity: using abstractions when there is only one type of implementation for the project (notifications are just e-mails, to use the previous example) will introduce unnecessary additional complexity (over-architecture).
  • Over-abstraction: Too many abstractions can make interactions between different parts of the application less clear.

Related considerations

In addition to the benefits and challenges directly linked to IoD, it’s essential to consider other aspects that can influence its effective application in software development projects.

Choice between Abstract and Interface

The choice between using an abstract class and an interface is crucial when implementing the DIP :

Abstract: An abstract class allows you to define certain methods that can be implemented directly, and others that must be defined by subclasses. This is useful when part of the behavior must be shared between several implementations.

Interface: An interface contains only method declarations with no implementation. This forces all subclasses to provide their own implementation of each method, thus promoting even weaker coupling and greater flexibility.

Using Features

PHP traits, for example, allow you to reuse sets of methods in several independent classes. The use of traits needs to be considered carefully, because while they can reduce code duplication, they can also introduce hidden dependencies and complicate understanding of program flow:

Advantages of traits: allow code reuse without forcing a parent-child relationship, offering greater flexibility in class design.

Disadvantages of traits: can hide dependencies and make code difficult to follow, especially when they modify the internal state of a class or introduce naming conflicts.

Dependency Management Practices

Effective DIP implementation often requires a sophisticated dependency management system, such as those provided by IoC (Inversion of Control) containers in frameworks like Symfony. These tools facilitate the instantiation and management of dependencies, often through annotations, enabling maximum code flexibility and decoupling.

Implications for Design Patterns

The adoption of DIP also favors the use of various design patterns:

  • Factory Pattern: Used to centralize the creation of objects, which is particularly useful when the object must be created according to a certain configuration or context.
  • Strategy Pattern: Used to select the algorithm for object behavior at runtime, which is useful for systems that need to be scalable in terms of the types of tasks they can perform.
  • Observer Pattern: Facilitates notification of changes to multiple classes, which is often necessary in complex systems where actions in one part of the system may require reactions in other parts.
  • Chain of responsibility Pattern: Reduces the complexity of a process by handling each business rule individually in a dedicated class, which may or may not intervene in the process according to its own decision.

Conclusion

For developers, adopting Dependency Reversal means using a design style that prioritizes flexibility and long-term maintainability over a slight increase in initial complexity. It encourages thinking about the “how” only after defining the “what”, enabling more robust and scalable applications to be built.

In our view, mastering this principle is essential for creating solid, easily extensible software.

Navigating with TheCodingMachine: secure web projects

The world of web development is not without danger! You can’t necessarily avoid hackers, but you can try to defend yourself against them. Navigating this world with TheCodingMachine, we take the subject very seriously and explain how.

This article details our approach, the different stages and what we do. Join us on this adventure, where every line of code is a step closer to the treasure trove of IT security!

ISO 27001, our compass

Every good navigator needs a compass, and that’s where our ISO 27001 standard comes in. It’s there to guide us on the right course, away from hacker-infested waters. The document entitled “Secure IT Development Policy” provides a detailed overview of the measures and procedures put in place by TheCodingMachine to guarantee security in the development of IT projects. This policy is managed and monitored via the Zoho Projects project management tool. Specific security tasks, such as code audits and vulnerability tracking, are automatically integrated into project templates.

Navigation preparation

Right from the start of the project, a security manager is appointed, often the project manager, accompanied by a member of the technical management team. The first analyses of security issues are carried out, including access control, session management, encryption, logging, supervision and data sensitivity.

From the very first interactions with the customer, we prepare the journey: authentication, data protection, encryption.

This enables us to define the technical framework: architecture, RGPD, access controls (which “protocol”, which reinforcements), level of application hardening or even level of infra hardening. We make sure that every member of the crew knows his or her role on the ship. There’s no question of sailing by sight!

naviguer avec TheCodingMachine

En Pleine Mer: Development

It’s on the high seas that storms can be encountered: source code management, choice of tools, code reviews…
Securing source code is a priority, with regular awareness of the top ten vulnerabilities according to OWASP.
The choice of Open-Source libraries takes security into account, with particular attention paid to updates and the community that supports them. Systematic code reviews are carried out to guarantee security and quality.

We scan the horizon to avoid hidden reefs of vulnerability.

The landing

Before going live, a final, thorough audit is carried out. SQL injections and security flaws are sifted through…

It’s time to monitor production data: there must be no production data in pre-production. If it is not possible to reproduce the problem, you should offer a ‘live’ reproduction, reading the logs in parallel whenever possible. If there is an absolute need to import production data locally, a procedure (including customer validation) must be followed, and it is necessary to consider anonymizing the data (and destroying the data at the end of the process).

Once the application has gone live, vulnerability monitoring helps to maintain its security. For example, at TheCodingMachine, we use a tool to check dependencies (CKC).

Conclusion

Sailing with TheCodingMachine guarantees a secure adventure in the tumultuous seas of web development. We promise you a journey as exciting as a treasure hunt, with the certainty of finding safe and reliable booty. So, are you ready to embark with us?

Note: if you’re interested in our dependency management tool (CKC), please don’t hesitate to contact me.

Posted in TCM

Real-time web: every millisecond counts!

On a website, an “offline” status that changes to “online” without you having done anything? A sales representative talking to you in a messaging system? Then the real-time web is just around the corner…

The real-time web is a system for responding to events in a very short space of time (a few milliseconds). In projects, real-time is often used to synchronize data from several users almost instantaneously and simultaneously. And the applications are manifold: live score updates in online games, real-time collaboration as in a document, notifications, trading… The aim is to inform users of changes as soon as they occur, without requiring any action such as refreshing the page.

What exactly is real-time web?

Some examples

A good example of real time is instant messaging systems on social networks. In the Facebook application, messages are received immediately after being sent, with no need to refresh the page. This is quite different from the old-fashioned way of sending messages via e-mail (the “send/receive” button) or on discussion forums.

Another example is an auction system. The bidder needs to see the current bid amount update automatically. Without this, the user experience could be frustrating. And that’s the whole point of the real-time web: to improve the user experience.

If you want to experience real time, don’t hesitate to visit our metaverse: Workadventu.re!

Let’s take this a step further…

Technically, real time corresponds to the implementation of an automated system that responds to various events occurring on the application as a result of user action (but not only: we can also imagine events triggered by data sensors or machines) and thus notifies other users of the occurrence of said events. Of course, real time is not mandatory, and most sites can do without it. However, it has gradually become indispensable, as it greatly enhances the user experience.

Overview of real-time web technologies

So what are the technologies that enable you to work in real time? NodeJS, for example, is often used for its non-blocking asynchronous system.

Here’s an overview of these technologies:

WebSocket

This is the most widespread technology. It opens a two-way connection between a client (a web browser) and a server, then persists this connection so that the client can send information to the server and vice versa. You can compare this technology to telephone communication.

Libraries such as Socket.io make it “easy” to implement websockets. Technologies such as Soketi can also be used to install websockets servers without too much configuration on your part.

If you don’t want to or can’t develop your own websockets server, there are paid third-party services such as Pusher or Ably to make the job easier.
What’s more, at TheCodingMachine we’re Laravel certified, and Laravel has just released a first-party technology for implementing websockets: Laravel Reverb, making it even easier to implement from a technical and security point of view.

SSE (Server Sent Events)

This is a one-way communication technology: the server sends data to the client when it’s needed.

You can use a server with Mercure as a free, open-source solution.

If you don’t need to receive data from users, it’s a solid choice over websockets.

Polling

This is not a specific technology, but rather a pattern. The client (browser) makes regular HTTP requests to the server (e.g. every 5 seconds) to update the data. This is called automatic refreshing.

Beware of the server load and the number of requests per second this can generate. It’s more a question of synchronization than real time.

WebRTC / Peer-to-peer

Ideal for video and audio streaming. Works over a direct peer-to-peer connection (between two clients). You can use the native WebRTC APIs available in modern browsers to implement this system. You will certainly need a signaling server. This is a server which, when a new user logs on, provides a list of other users so you know with whom to establish the peer-to-peer link.

This technology is fast and efficient, but has its limits if you want to connect too many users together. Libraries such as simple peer will help you implement this technology.

WebRTC remains a special case in real-time data exchange, since it has been developed for voice/video exchange, rather than “simple” data exchange, where other solutions (or the signaling server) are preferable.

And a few more…

There are many other ways to make real time:

  • MQTT: Message Queuing Telemetry Transport → used in IoT, pub/sub (publish / subscribe) messaging protocol with an intermediate broker system to clients.
  • SignalR: specific to the .NET ecosystem → similar to websocket, bidirectional connection.
  • Long polling: a variant of polling where the server holds back the response to be sent until there is new data.
  • A push server with HTTP/2

TechnologyShort descriptionBidirectionalEfficiencySimplicityTypical use
WebSocketThe client (browser) and server can exchange information at any time and in both directions.⚡️⚡️⚡️➕➕ (thanks to the many resources available)Online games, instant messaging, data exchange.
WebRTC Peer-to-PeerTwo clients exchange data with each other (very good for video or audio).⚡️⚡️⚡️➕➕(thanks to the many resources available)Video or audio calls.
SSE (Server-Sent Events)The server sends information to the client when it has news.⚡️⚡️➕➕Live notifications, news, updates.
PollingThe client makes a regular request to the server.⚡️➕➕➕Regular verification of new data, very lightweight applications.

Ready to add real-time web to your application?

If you don’t use paid services and decide to implement your own servers for real-time management, a number of security and scalability issues arise.

Security

When implementing a real-time system, you need to ensure that only the right people send and receive data via this additional layer.

This requires extra work to set up authentication, authorization and session management. Make sure you also encrypt your data in transit, using secure protocols such as WSS (websockets) or HTTPS (polling, sse).

Stored data (such as chat history) should also be encrypted / protected.

Scalability

Real-time applications are not the easiest to scale. As your application grows (and so does the number of users), you’ll need to opt for horizontal scaling with a load balancing system.

Deploying your application with Docker or Kubernetes can help. It’s easy to imagine duplicating the containers running the real-time system.

No internet connection?

A real-time application greatly enhances the user experience, but it requires a permanent, stable Internet connection to ensure that the experience is not spoiled.

Conclusion

The real-time web is like magic: powerful and useful, but requiring mastery. Whether you’re chatting with friends, playing online games or making fast transactions, real-time is everywhere, making the user experience faster, more responsive and more efficient than ever.

However, its implementation is far from trivial, and requires careful thought about your use cases and the technology that will be best suited to them.

In many cases, choosing WebSockets with a NodeJS server and Socket.io will do the trick, and also allow you to experiment quickly.

Article written by Paulin BAT

ISO 27001 standard: implementation at TheCodingMachine!

If you don’t know what ISO 27001 standard is, here’s an article that succinctly describes what it is, why we’re doing it and where we are. It’s an ongoing project, not yet a feedback report. If you’d like to discuss the subject with me, please don’t hesitate to get in touch!

Image illustrating cybersecurity for ISO 27001 standard

First, what are the key points of ISO 27001 standard?

ISO 27001 is an international standard for information security management. It is designed to implement, maintain, monitor and improve an information security management system (ISMS) within an organization. The main objective of ISO 27001 is to guarantee the confidentiality, integrity and availability of sensitive and critical information. A few key points:

  • It aims to help organizations establish a framework for identifying, assessing and managing information security risks: data loss, cybercrime, security breaches, service interruptions and other information-related threats.
  • Implementing an ISMS involves identifying critical information assets, assessing risks, implementing appropriate security controls, training employees and continuously monitoring ISMS performance.
  • Organizations must be audited by independent third parties to verify compliance with ISO 27001 standard.

Finally, this standard encourages continuous improvement in information security management. Organizations are encouraged to regularly monitor and review their ISMS to ensure that it remains effective in the face of changing threats.

Why implement this approach?

Admittedly, we started this process somewhat under duress. One of our major customers required it of its partners. On closer examination, we realized that it could be interesting for several reasons:

  • Better protect sensitive information such as customer data, financial data or trade secrets.
  • Reduce security threats and incidents such as data breaches, service interruptions and cyber-attacks.
  • Comply with legal and regulatory information security requirements.
  • Strengthen trust with our customers and business partners.
  • Better manage business continuity, be prepared for service interruptions, disasters and emergencies.

We also hope this approach will enable us to :

  • Improve operational efficiency by streamlining information security processes and operations.
  • And potentially save money (security incidents can entail significant costs).

What we’ve done and what’s left to do!

The first thing we did was to set up a project team comprising employees from different departments with knowledge of our various processes: IS, HR, Management, Sales, Projects, Technical Management. This team, accompanied by an external auditor from France Certification, enabled us to carry out an initial assessment of the situation: identifying information assets (data, systems, equipment, documents and processes), the threats we might encounter, vulnerabilities and associated risks.

Next, we defined the objectives of our ISMS, identifying the processes, services, locations and information assets to be included within its scope. We also drew up: our IT charter, our secure development policy, our transfer policy and so on. We also set out the organization’s security commitments.

Finally, we have put in place the first elements of our ISMS:

  • Managing information assets such as data, systems, equipment and documents. For example, we realized at this stage that our leases were not being managed very well (we still had leases on computers we no longer had!).
  • Information security risk analysis: identifying and assessing the risks associated with information assets. This is undoubtedly the most time-consuming phase, as you have to go through all the risks and vulnerabilities associated with your organization.
  • Based on the risks we had identified, we drew up and implemented a treatment plan and security controls using Annex A of the ISO 27001 standard. These include technical, organizational and physical controls.
  • The risk treatment plan, which defines how risks are assessed, managed and monitored over time.
  • The organizational structure, including roles and responsibilities for information security, has been clearly defined.
  • Procedures for managing security incidents, with everything recorded, documented and stored.

In addition, several meetings were held with all employees to raise awareness of information security, and to understand the risks and security practices involved. To make the subject a bit fun, we even ran several quizzes and random tests to ensure that the message was well understood and sufficiently integrated.

Les prochaines étapes sont d’effectuer un audit interne pour évaluer la conformité aux exigences de la norme ISO 27001 et pour identifier les éventuels écarts et l’audit de certification qui sera mené par un organisme de certification accrédité.

To conclude

ISO 27001 standard certification takes time and commitment, but we believe it’s essential to strengthen information security and meet security requirements.

Next episode: external audit date September! We’ll keep you posted…

An article by Nicolas Peguin

Posted in TCM